Sunday, 24 April 2011
Colour 11 and Finished
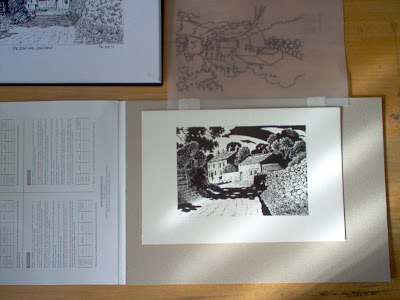
Newbridge and the track to Silverdale-Littondale.
Reduction Linocut. 170mm x 260mm.
Edition of 5.
Not quite what I intended when I started out with this print, but considering the difficulties I have had with it I'm very pleased with the result.
Tuesday, 19 April 2011
Colour 10, nearly there now
A dark green to give the trees and the darker vegetation on the hillside a lift.
My original interest in this view was triggered by the contrasting landuse being shown by the different colours of the vegetation. The fields in the valley bottom are used as pasture, and the grass grown, originally for a hay crop but nowadays cut for silage. On the hillside, the rougher pastures that are too steep to crop, gradually give way to darker coloured heather and bilberry moorland.
Monday, 18 April 2011
Blundering back on track
Continuing this masterclass in how not to go about making a reduction linocut. As the foreground green is now too dark, I overprinted a light green.
after nine colours we are nearly finished. Two colours to go now I think.
and then a darker blue onto the river and the distant hill.after nine colours we are nearly finished. Two colours to go now I think.
Sunday, 17 April 2011
Digging my way out of a hole
Following my last post I've been debating what to do about this print. Having completely messed up with the colour order during printing, I was tempted to abandon the print altogether. However, having slept on it I decided to continue and see if I can salvage something from it. So on with the next colour:
The foreground is now too dark, its going from bad to worse!
Saturday, 16 April 2011
The less said the better
Friday, 15 April 2011
New Gallery
I dropped off some Linocuts at a new gallery for me. The Ryburn Gallery at Sowerby Bridge near Halifax. Further details can be found at : www.ryburngallery.com
Thursday, 14 April 2011
Tuesday, 12 April 2011
Sunday, 10 April 2011
Starting the next print
Sunday, 3 April 2011
Scraperboard Step by Step
I thought it might be of interest to show the stages involved in completing a Scraperboard engraving. 


I draw out a pen and ink cartoon the same size as the finished piece. This drawing although dated March 2011 is based on a quick sketch drawn in 1987. This is then carefully traced onto the Scraperboard. In this case I'm using white board. I prefer to use white rather than black as I find it more versatile. I can ink up the areas which I want to be the darker tones and leave the paler tones white. I'm trying to to make a drawing that has its own character, rather than replicate a wood engraving.

I then start to ink in solid areas of black. These will either remain black or will be engraved into with a stylus to reveal the white board beneath the ink.
Having established the black areas with a brush I start to draw into the paler areas, mostly with a fine pointed mapping pen but also brushing some marks to represent different types of vegetation.
The drawing stage (above) is now complete, so I put the drawing aside to let the ink dry before engraving into it to bring out the finer details below.
Subscribe to:
Comments (Atom)


