Saturday, 8 September 2018

Thursday, 7 June 2018
Long Tailed Tit

Long tailed Tit
Drypoint
69mm x 130mm
Edition of 20
A small, quick drypoint made simply, by placing a piece of clear plastic over my original field sketch drawing and scratching the design directly on to the plate.
Tuesday, 17 April 2018
Blencathra from Castlerigg Stone Circle
Finally finished and editioned the Blencathra mezzotint. Just in time to get it mounted and framed ready for Printfest in Ulverston on 5th and 6th May.

I have been working on this print on and off since last October and finally finished the platework and printed the edition over the last couple of days. I thought it would be interesting to know just how long it would take so I kept an accurate record of just how much time I spent working on it.
Grounding the plate with 24 passes of the rocker took 30 hours
Preliminary drawing took 3.5 hours
Drawing the design on the plate took 2.75 hours
Engraving the design on the plate took a further 160.5 hours, this time including printing a number of impressions at various stages to check progress on the platework.
Finally printing 23 impressions for the edition took 13.5 hours.
A total time of 210.25 hours, something of a surprise as the general impression that I had was that I'd spent a lot longer on it. This time was spread out over 6 months so I wasn't working continuously on just this one print. To put this in context, assuming a standard working week of 40 hours this would have taken a little over 5 weeks of continuous work.

Blencathra from Castlerigg
200mm x 300mm
Mezzotint
Edition of 20
I have been working on this print on and off since last October and finally finished the platework and printed the edition over the last couple of days. I thought it would be interesting to know just how long it would take so I kept an accurate record of just how much time I spent working on it.
Grounding the plate with 24 passes of the rocker took 30 hours
Preliminary drawing took 3.5 hours
Drawing the design on the plate took 2.75 hours
Engraving the design on the plate took a further 160.5 hours, this time including printing a number of impressions at various stages to check progress on the platework.
Finally printing 23 impressions for the edition took 13.5 hours.
A total time of 210.25 hours, something of a surprise as the general impression that I had was that I'd spent a lot longer on it. This time was spread out over 6 months so I wasn't working continuously on just this one print. To put this in context, assuming a standard working week of 40 hours this would have taken a little over 5 weeks of continuous work.
Monday, 2 April 2018
So much for an Easter Break
Spent all weekend working on the mezzotint plate, printed two impressions and finally the end is in sight. Just a little bit of burnishing needed on the clouds to bring out the highlights and smooth out some of the abrupt tonal transitions and it will be ready to edition.


Monday, 19 March 2018
Hen Harrier - Drypoint

Hen Harrier
Drypoint
67mm x 110mm
A quick little drypoint study of the most persecuted bird in Britain. The plate was made from a piece of clear plastic which I placed over my original pen sketch and scratched through with a drypoint needle.
Sunday, 11 March 2018
Some Wildlife - for a change.

15 colour Reduction linocut printed in 9 stages.
190mm x 170mm.
Edition of 9
I've been working on a mezzotint plate for the best part of the last three months, which is still a long way from being ready to print an edition from. So it felt good to spend two weeks making this little linocut and finally getting something completed on paper.
Sunday, 11 February 2018
Castlerigg - 2
Got up early this morning and printed two impressions from the plate to get an idea of how much more work is needed.


The plate, inked, wiped and positioned on the bed of the press.

1st Impression

2nd Impression
Overall pretty much what I was expecting, still quite a lot of the plate needs to be lightened. The whole sky area needs brightening up especially the clouds above the top of the fell. The wisps of mist sweeping off the summit need to be blended back into the clouds. Although I want to keep the area in the top left quite dark to act as a foil to balance the dark line of spruce trees in the lower right. The two foreground rocks need more work to bring out the texture in the stone and I haven't yet decided what to do with the dark shadow areas running across the foreground.
Saturday, 3 February 2018
Folksy Shop
I have added three new prints to my on-line shop, 2 mezzotints and a new linocut.

Gathering Storm, Linocut. £200.00. Sold Unframed.

Badger, Mezzotint. £50.00. Sold Unframed.

Blea Gill Waterfall - Nocturne. £100.00. Sold unframed.
My on-line shop can be found here
Monday, 1 January 2018
Castlerigg Mezzotint - The Begining.
The start of a new mezzotint print. From the original water colour sketch I made a tonal pencil study which I then scanned and printed off in reverse ready for transferring to the plate. The plate had been rocked with an 84 gauge Lyons rocker in 24 directions with a 50% overlap, about 36 hours work in total. At 200mm x 300mm this is the largest mezzotint I've attempted so far.
The location for the study is the Castlerigg Stone Circle in the Lake District looking north towards Blencathra.

The original watercolour sketch

Tonal study in pencil and ink wash

The study scanned and printed in reverse

Transferred on to the copper plate

Starting the plate work.
Saturday, 18 February 2017
Ready to Edition
After a couple more weeks working on the mezzotint plate it is now at a stage where it is ready to edition.


Sunday, 29 January 2017
Blea Gill - Mezzotint
I started a new mezzotint just before Christmas, beginning work on putting the image on to the plate the first week in December. By mid January the plate was at a stage where I needed to take an impression just to give me an idea of how it would look like printed. On the plate the image looks quite well defined, however this is very misleading as can be seen on the 1st state impression, which is still very dark and on paper not as well defined as the plate image would suggest.

Plate at state i
 Image at state i
The image is very dark and with little definition. The sky is starting to take shape and while the waterfall is clear it needs more burnishing to bring out the highlights on the water.

Image at state ii
 Image at state iii
More work on the sky, a combination of scraping and burnishing back the burrs is starting to define the clouds and veils of mist sweeping down the valley towards the waterfall.
 Image at state iv
Slowly pulling out and sharpening up the image. At this stage the image is almost ready to edition. The cliff to the left of the waterfall needs to be lightened up, it is supposed to be sunlit! The clouds need to be lightened in parts to break up the uniform grey tone.

Plate at state i

The image is very dark and with little definition. The sky is starting to take shape and while the waterfall is clear it needs more burnishing to bring out the highlights on the water.


More work on the sky, a combination of scraping and burnishing back the burrs is starting to define the clouds and veils of mist sweeping down the valley towards the waterfall.

Slowly pulling out and sharpening up the image. At this stage the image is almost ready to edition. The cliff to the left of the waterfall needs to be lightened up, it is supposed to be sunlit! The clouds need to be lightened in parts to break up the uniform grey tone.
Sunday, 18 September 2016
Devils Arrows

Devils Arrows - Boroughbridge
Reduction Linocut
240mm x 358mm
Edition of 10
Printed in 23 colours in 16 passes. Way more colours than there should have been but I didn't really have a plan when I started this print and more or less made it up as I went along, gradually adding more colours.
These are two of the three Devils Arrows standing stones in the Ure Valley near Boroughbridge in North Yorkshire. Not quite aligned in a straight line the third stone, partly hidden in trees is behind the viewpoint of this image.
If you wish to purchase this print it can be found at my on-line shop here
Thursday, 15 September 2016
Tynemouth Update

Finally got the mezzotint to a stage where I'm happy that it's ready to edition. Just a little more burnishing on the foreground grasses to bring out the highlights and it's finished.
Tynemouth
Mezzotint printed in 3 colours.
150mm x 200mm.
Wednesday, 13 July 2016
Tynemouth
This is an image that I've been playing around with for the last couple of years. I've already tried to make a linocut of it twice and failed, so now I'm trying a mezzotint. Grounding of the plate began in early April and took a couple of weeks work. Since then I've been working on the plate intermittently between printing linocut editions.

Starting from a tonal pencil drawing taken from my original pen field sketch. I scanned the sketch and printed it off in reverse (above). From this I began working on the plate. Gradually scraping away the ground to reveal the lighter areas.
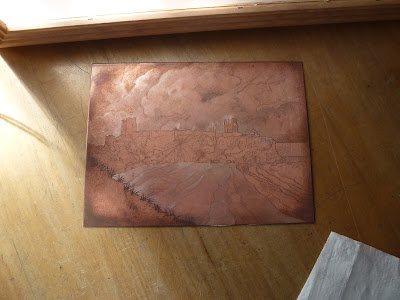


1st state impression. This proof reveals the basic image although one with much work still to do. Overall it is still very dark. The breakers and beach need much more work as does the cloudscape above the castle.

After a bit more scraping and burnishing I took another impression. Already there is a big difference from the 1st impression but there is still much to do. Gradually though the image is starting to come together. The waves breaking on the beach need to be better defined but I'm pleased with the way it is going.

Starting from a tonal pencil drawing taken from my original pen field sketch. I scanned the sketch and printed it off in reverse (above). From this I began working on the plate. Gradually scraping away the ground to reveal the lighter areas.


1st state impression. This proof reveals the basic image although one with much work still to do. Overall it is still very dark. The breakers and beach need much more work as does the cloudscape above the castle.

After a bit more scraping and burnishing I took another impression. Already there is a big difference from the 1st impression but there is still much to do. Gradually though the image is starting to come together. The waves breaking on the beach need to be better defined but I'm pleased with the way it is going.
Curlew

Song of the Moors
8 colour reduction linocut
Edition of 10
190mm x 170mm
The print has now been listed on my Folksy shop and can be found here
Wednesday, 22 June 2016
Curlew print - next colours


Next couple of colours on the curlew print, a mid brown and darker blue grey. A final dark brow will see it finished.
Sunday, 19 June 2016
Curlew - First stages
Started on a new lino print, originally intending it to be of two curlews but after some preliminary juggling around decided to leave the second bird out.


After cutting out the white areas, the first colour above, is a blend of 3 pale greys working from top to bottom.
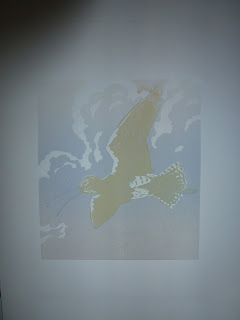
Next much of the cloud surrounding the bird is cut away and the block inked with a pale yellow brown.

Colour 3 is a pale blue. I thought a lot about how to do this. Initially I was going to do it as a blue to pale blue grey blend as I needed the lower part of the print to look as if it was receding into the distance. In the end I decided on using a flat blue colour, relying on the greys of the cloud in the lower half to shift the appearance of the blue there making it look less bright than in the top half where it sits alongside the white of the paper.

Colour 4. With the sky finished all that remains on the block is the shape of the bird, this is inked in a darker version of the first brown colour.

Colour 5. A darker blue completes the shadows under the birds wing. Should be finished after another couple of colours. Hopefully in time for the Art Market at Holmfirth next weekend. If not it will be finished for the Sheffield Print Fair in July.


After cutting out the white areas, the first colour above, is a blend of 3 pale greys working from top to bottom.
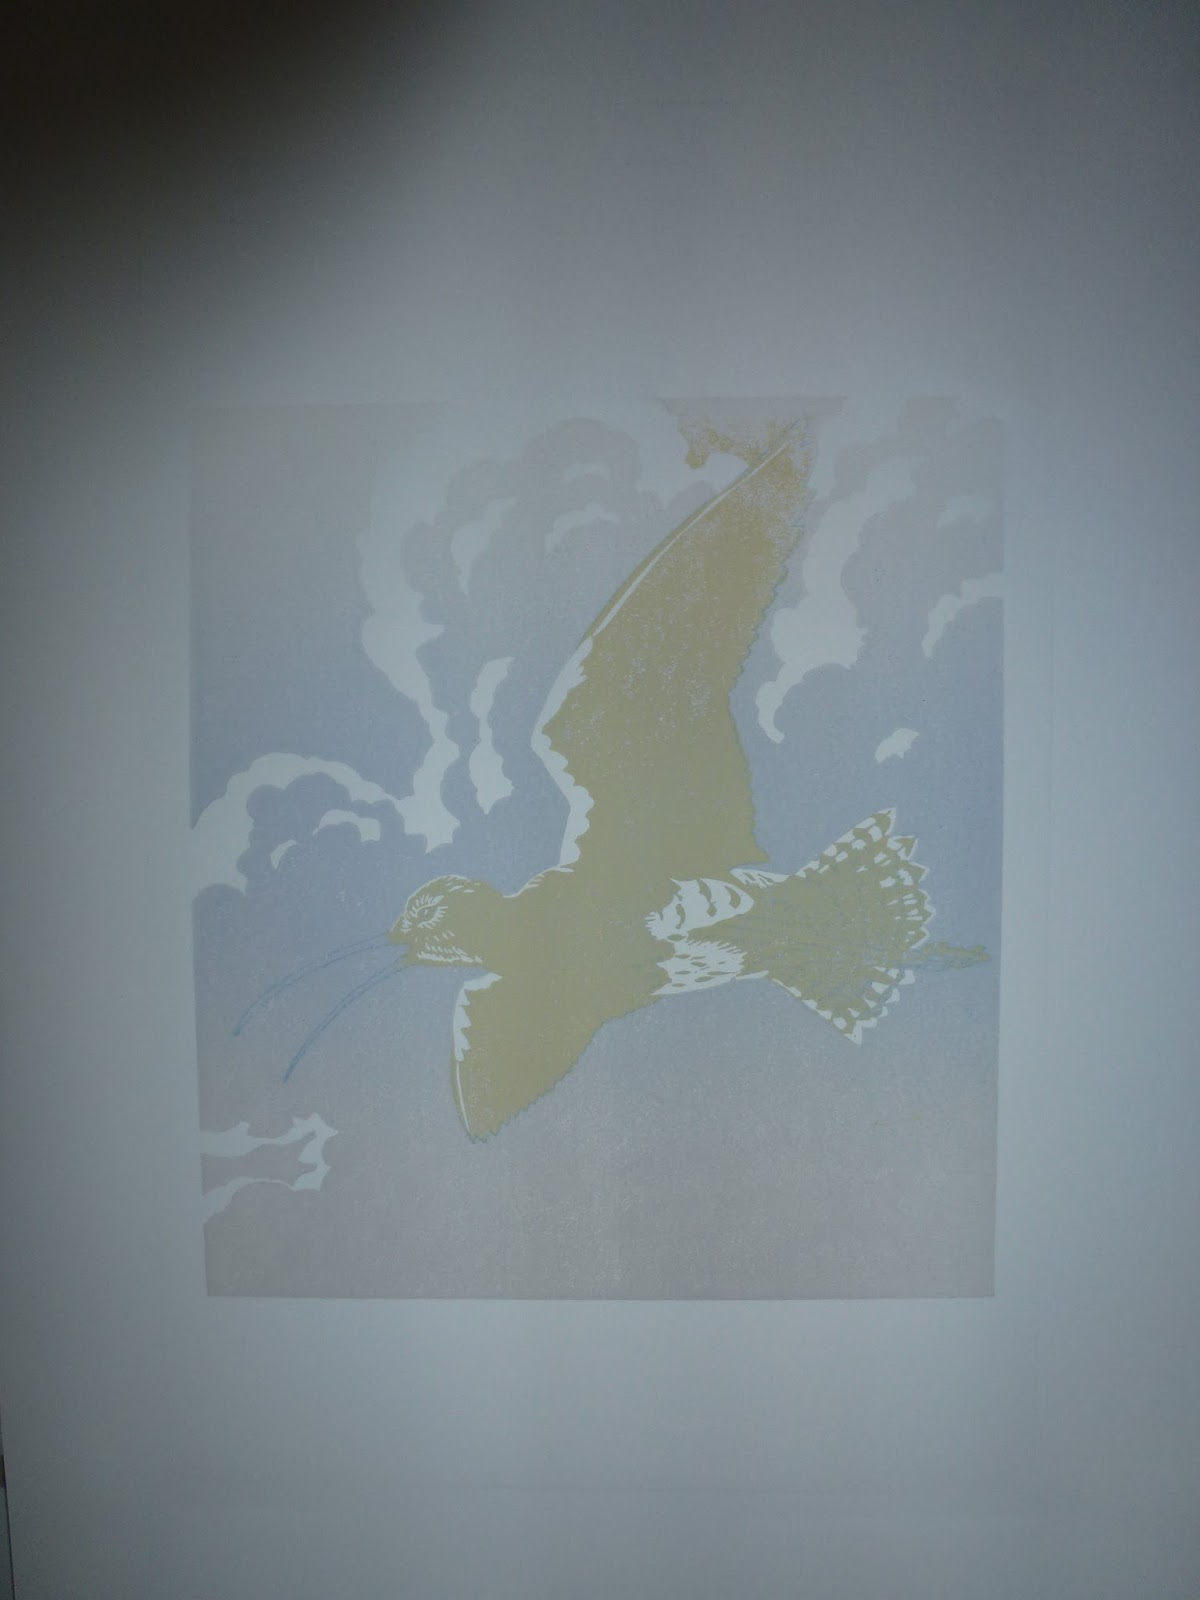
Next much of the cloud surrounding the bird is cut away and the block inked with a pale yellow brown.

Colour 3 is a pale blue. I thought a lot about how to do this. Initially I was going to do it as a blue to pale blue grey blend as I needed the lower part of the print to look as if it was receding into the distance. In the end I decided on using a flat blue colour, relying on the greys of the cloud in the lower half to shift the appearance of the blue there making it look less bright than in the top half where it sits alongside the white of the paper.

Colour 4. With the sky finished all that remains on the block is the shape of the bird, this is inked in a darker version of the first brown colour.

Colour 5. A darker blue completes the shadows under the birds wing. Should be finished after another couple of colours. Hopefully in time for the Art Market at Holmfirth next weekend. If not it will be finished for the Sheffield Print Fair in July.
Sunday, 12 June 2016
Latest works
Been a bit quiet on the posting front lately but here is a selection of the finished and works in progress so far.


Mezzotint plate in progress. I've been working on this plate on and off since the end of April. I think I've gone as far as I can now and need to take a print from it, to see if what I think is on the plate, translates on to paper. Once I have an impression taken I'll be able to see which areas need further work.

1st stage of a new linocut, a 3 colour blend from top to bottom of warm and cool grey through to a darker warm grey.

Pendragon Castle, Mallerstang.
Reduction Linocut.
18 colours printed in 9 stages
Edition of 10

Mezzotint plate in progress. I've been working on this plate on and off since the end of April. I think I've gone as far as I can now and need to take a print from it, to see if what I think is on the plate, translates on to paper. Once I have an impression taken I'll be able to see which areas need further work.

1st stage of a new linocut, a 3 colour blend from top to bottom of warm and cool grey through to a darker warm grey.
Sunday, 10 April 2016
South Stack Lighthouse
Another linocut step by step, after doing wildlife subjects for the last couple of prints it's back to a straight forward landscape. Although as things turned out this was far from straightforward.
Step 1.
The areas to remain white are cut away from the block and a blend of warm grey to light blue rolled on the block and printed.


Step 2.
Another blended roll this time adding a light green to the bottom, then the warm grey and finally the blue at the top this time.


Step 3
A blend of 3 blues, sky blue at the top through to a greenish blue for the sea.
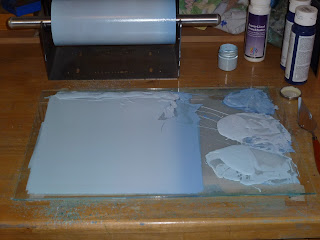

Step 4
A slightly darker version of the initial warm grey colour. Inked on to land areas of the print only.


Step 5
A pale green, again applied selectively to the block.

Step 6.
Another blend of blues.


Step 7
Now to add some details into the cliffs. Another darker version of the first warm grey colour with the addition of a little brown.


Step 8
Another darker blue to finish off the sea and add shadows onto the cliff face.


Step 9
The final dark - made from the blue used above with the addition of a little purple.


and the finished print.
Really pleased with this print but it's execution turned out to be something of a disaster and at one point I didn't think I was going to get any use able prints at all. The 100lbs cartridge paper I print on can usually be relied upon to stay flat throughout the printing process. This time, for reasons I can't explain it began to cockle after the second printing stage and by the fourth stage was becoming very difficult to use, causing real problems with the registration. In the end from an initial 10 impressions taken of the first colour I've finished with only 4 saleable prints.
Step 1.


Step 2.
Another blended roll this time adding a light green to the bottom, then the warm grey and finally the blue at the top this time.


Step 3
A blend of 3 blues, sky blue at the top through to a greenish blue for the sea.


Step 4
A slightly darker version of the initial warm grey colour. Inked on to land areas of the print only.
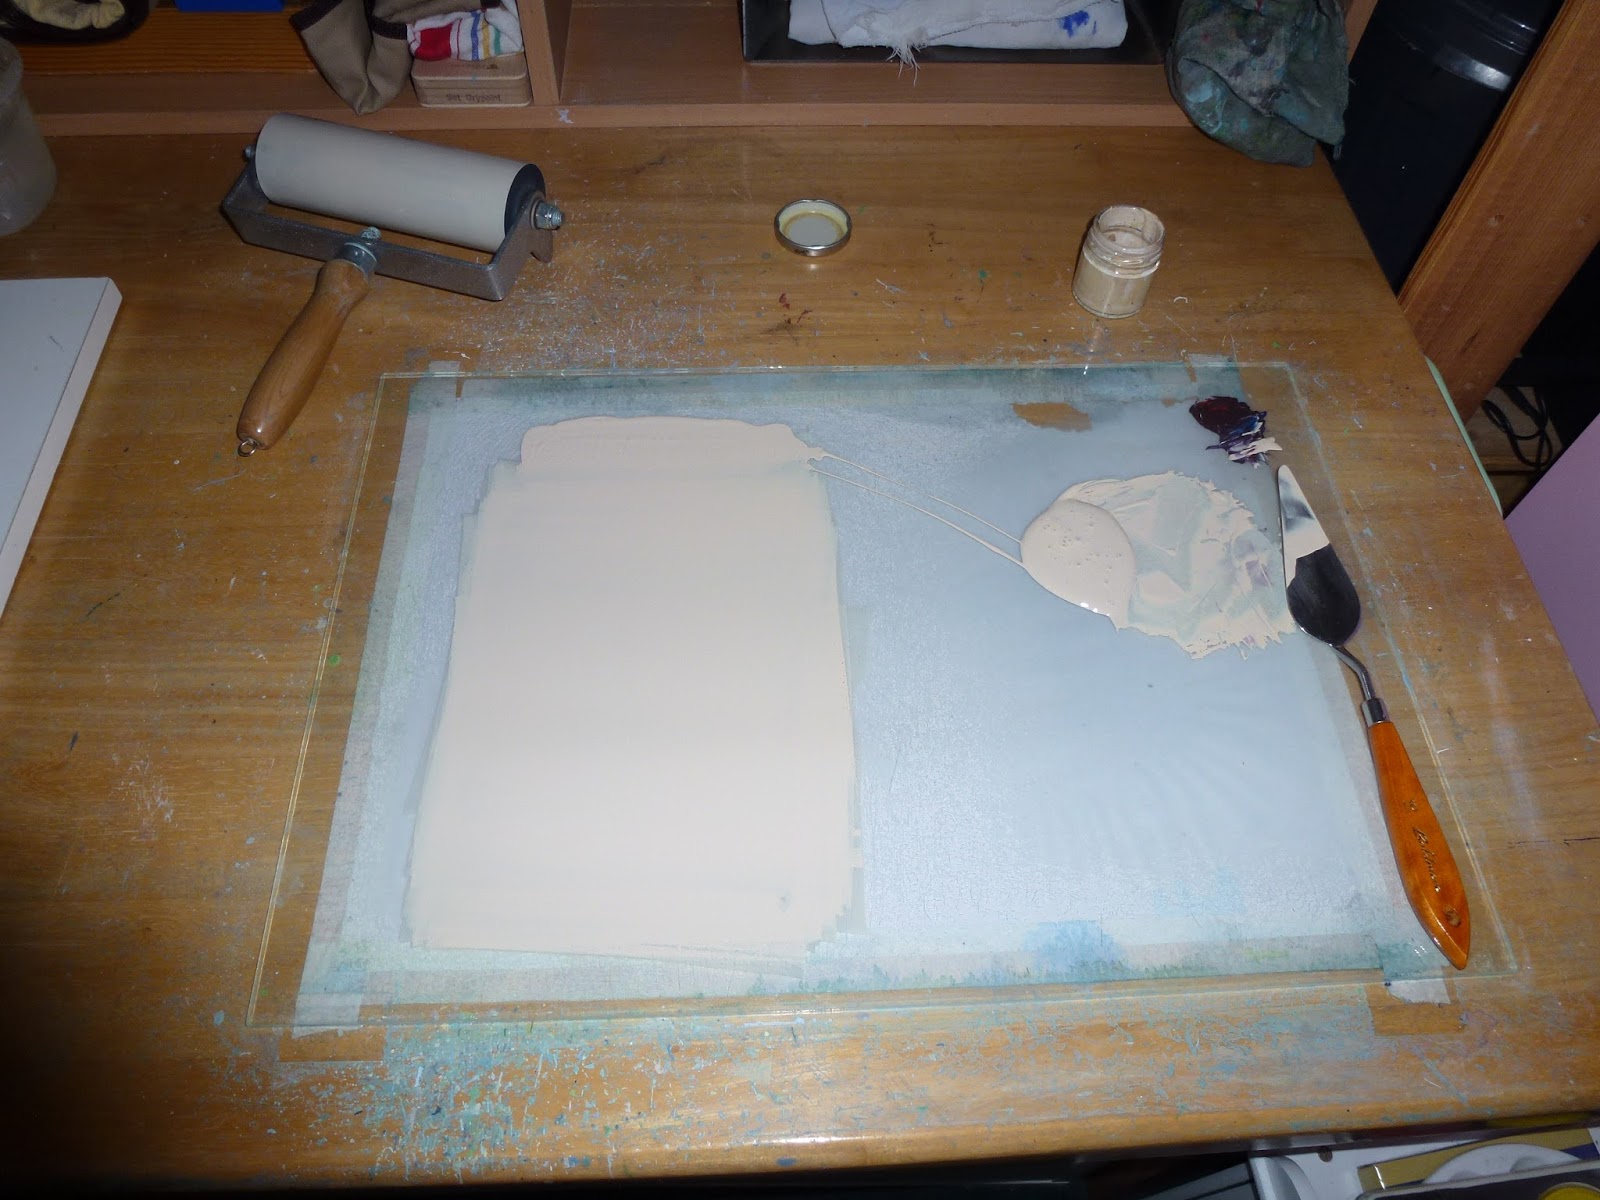


Step 5
A pale green, again applied selectively to the block.

Step 6.
Another blend of blues.


Step 7
Now to add some details into the cliffs. Another darker version of the first warm grey colour with the addition of a little brown.


Step 8
Another darker blue to finish off the sea and add shadows onto the cliff face.


Step 9
The final dark - made from the blue used above with the addition of a little purple.


and the finished print.
South Stack - Anglesey
Reduction Linocut
240mm x 360mm
Edition of 4
Really pleased with this print but it's execution turned out to be something of a disaster and at one point I didn't think I was going to get any use able prints at all. The 100lbs cartridge paper I print on can usually be relied upon to stay flat throughout the printing process. This time, for reasons I can't explain it began to cockle after the second printing stage and by the fourth stage was becoming very difficult to use, causing real problems with the registration. In the end from an initial 10 impressions taken of the first colour I've finished with only 4 saleable prints.
Subscribe to:
Posts (Atom)